How to Make a Halloween Cinemagraph with Photoshop CC and Adobe Stock
A cinemagraph is an experience, and not a specific file format or technical process, whereas a photograph captures a moment in time, leaving the viewer to interpret the story. A video has a beginning and an end. Through motion, video offers a story as a result of the progression through the duration of the frames. Here’s a PhotoBite guide on how to produce your own spooky Halloween cinemagraph in 10 simple steps
A cinemagraph captures the ‘moment in time’ of a photograph while incorporating cinematic effects of motion. This combination gives us the experience of animation without the need to interpret a linear story.
Back in the ‘olden days’ of the web, cinemagraphs were saved as animated GIF files. This was largely due to the fact that this file format was so largely supported. Since then, we’ve seen all forms of media used in creating cinemagraphs, including video, HTML, CSS and JavaScript.
This means we have a lot more options for creating a cinemagraph experience. In this piece, we’ll explore a workflow for creating a cinemagraph by compositing video, illustrations and photos with Adobe Photoshop.
Start with an Illustration from Adobe Stock
Searching using Adobe Stock, you can find this illustration of a spooky tree.
1.The first thing you should do is mask out the background. Create a new layer and begin by painting over the branches of the tree with a bright colour.
2. Load the pixels of the new layer as a selection. A shortcut for this technique is to hold the Command key [Mac], or the Control key [Windows], and click the layer thumbnail icon. Then, select the original tree layer, and add a new layer mask.
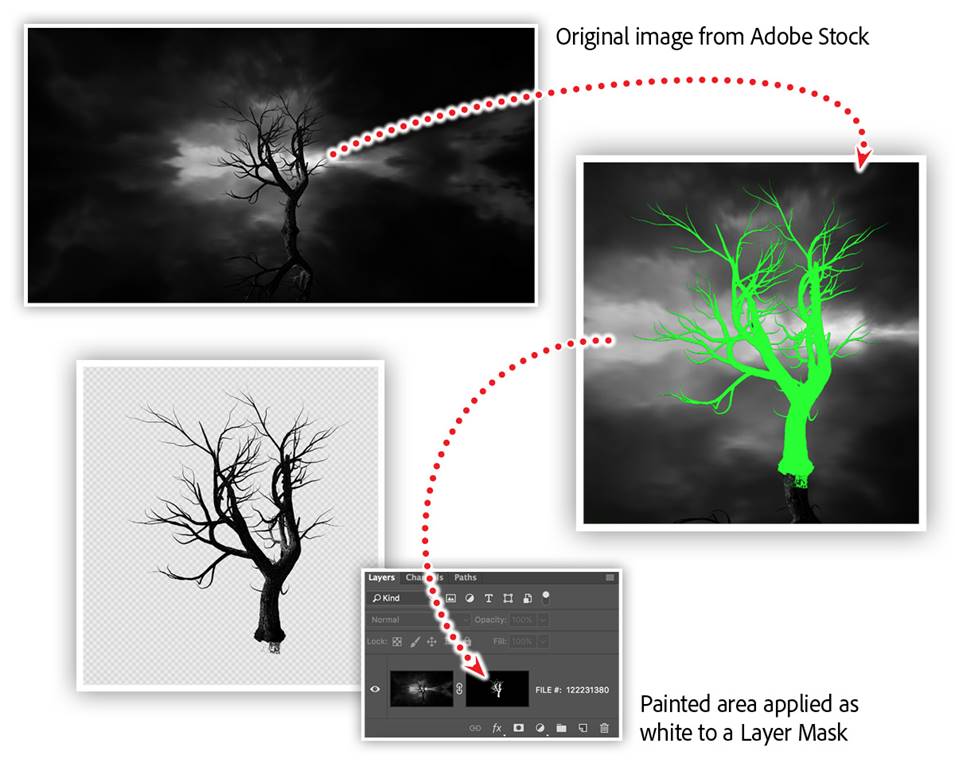
3. The result is that the branches of the tree appear white on the layer mask, and the remaining appears black. The result is a silhouette of the tree against a transparent background. Then, simply add a new layer, move it to the bottom, and fill the layer with a gradient from dark grey to black.
Adding the moon
4. Next, search Adobe Stock for an image of a full moon. Find the one you like, then add the file to your composition as a linked Smart Object. In order to apply a mask, edit the new Smart Object, added a circular layer mask.
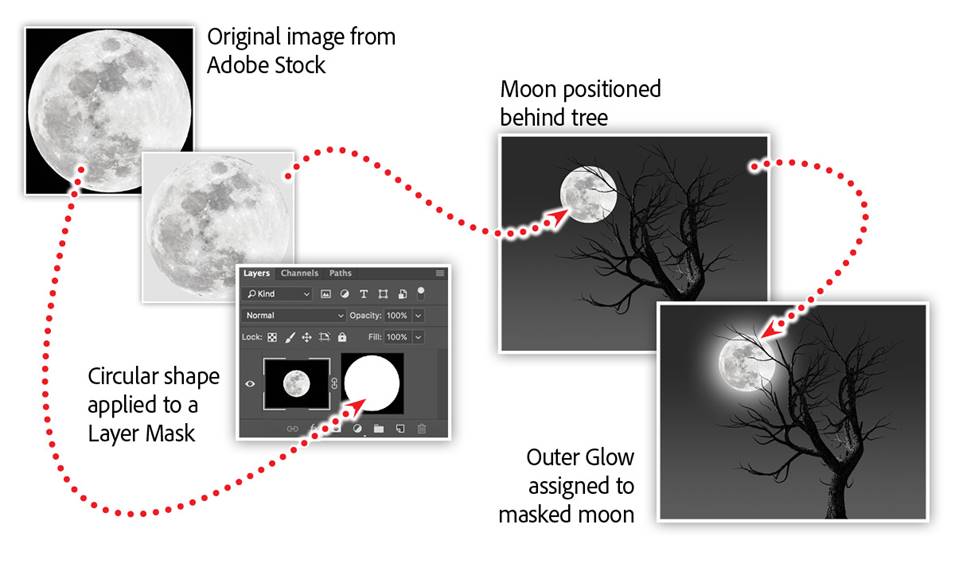
5. With the moon masked, add a 165-pixel white outer glow, with a spread of 6 and a blend mode of screen. This will create the effect of the moon glowing through dense clouds.
Working with video in Photoshop
6. Next, download two videos from Adobe Stock that are created to apply special effects to photos and video. See below for designed and animated black and white videos to help you simulate cinematic effects for a cinemagraph, video, and motion graphic project. In the Photoshop file, open the Timeline panel and create a video timeline. Import a video into a layer by choosing File > Place Linked, then selecting the clouds.mp4 file.
Note: If you use the ‘add media track’ option [the + button] in the Timeline panel, Photoshop will group the video into a video group. To remove the group, select it, and choose Layer > Ungroup
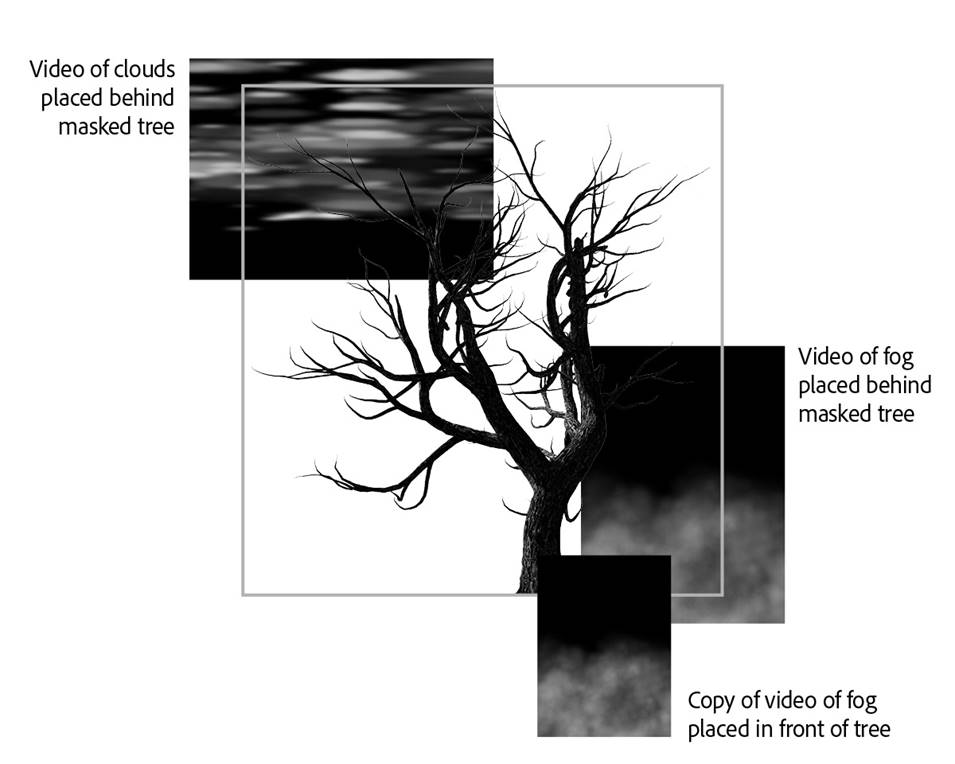
7. Position the clouds behind the tree and set the blend mode to ‘screen’. This will drop out the black areas of the video, and allow the moon to show through. Apply a layer mask and fade the right and left sides to be fully transparent. This will make the clouds appear to be lit by the mood.
8. Next, import the fog video, convert to a Smart Object, then position it behind the tree. Duplicate the fog video Smart Object, and position the copy above the tree. This will create some depth within the fog. Add a layer mask to both fog video layers. On the further back fog layer, set the opacity to 30% and mask the right and left edges to be transparent. This will create the same effect for the fog that we set for the clouds.
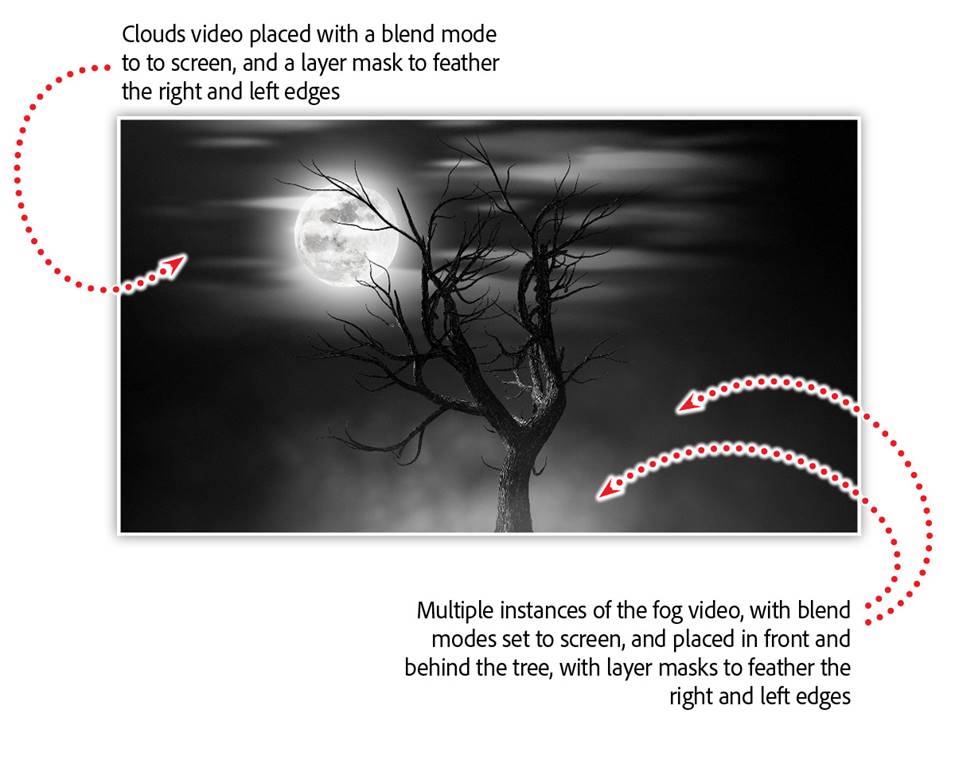
9. Finally, mask the right and left edges even further than the back layer, giving the illusion that this fog is even closer.
Render
The fastest growing file format for a cinemagraph is video, specifically an mp4. This file format allows for many more frames than an animated GIF, and results in a much smaller, single file. While CSS- and JavaScript-based cinemagraphs can be even smaller and randomised, they do require more files, and a subject for a separate feature.
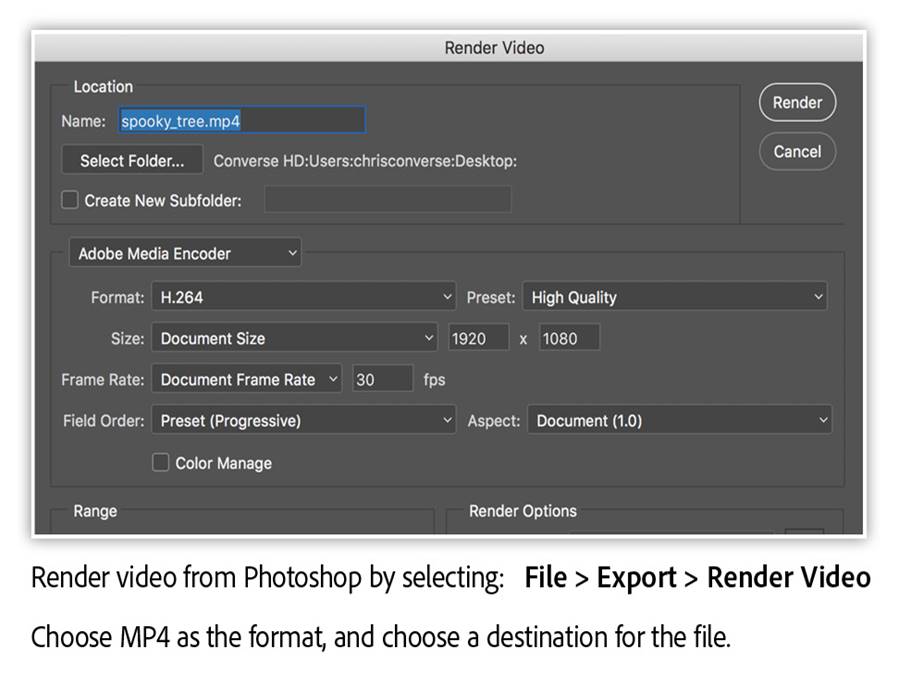
10. To render a video from Photoshop, select Render Video from the File > Export mnu.
Good luck – and happy Halloween from team PhotoBite!
n.b. We’ve published this guide as a Halloween treat, but of course, the same process will apply for any season.
About the author