Converting Analogue Images to Digital Files: Part 1
Previously, our contributor, Chris Patmore, has written about the ephemeral nature of digital files, and the importance of having your work in a tangible form, such as prints, books and, in one case, converting them to slide film. In this three-part article, Chris makes a welcome return, heading in the other direction of transferring analogue/film images into a digital format. The fact of the matter is that, whether we like it or not, it’s the way images are mostly consumed and viewed today and, apart from making darkroom wet prints, it is the only way to get them into a sort of printed format.
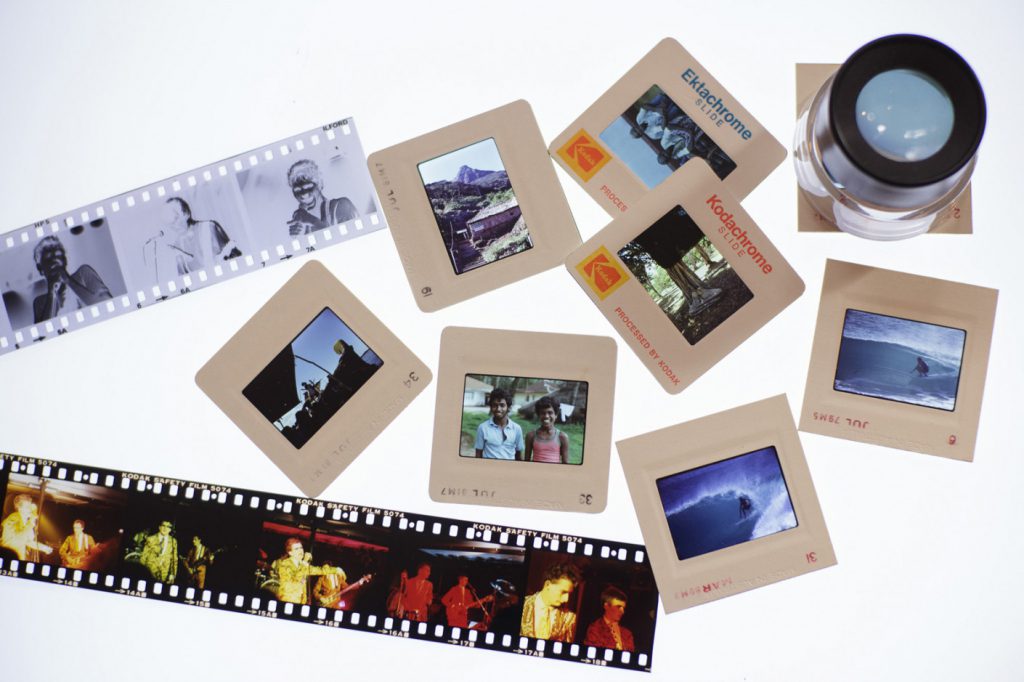
There are really only two methods of doing this; with a scanner, or, more recently with a digital camera. With film enjoying something of a growing resurgence, as well as people finding old family films and wanting to get them onto their computers and phones, the supply and demand for solutions have significantly increased, leading to a boom in affordable ‘consumer’ scanners and a rise in the prices of older, and generally superior, ones.
There has also been a lot of ingenuity shown in the ways people can use their digital cameras to ‘scan’ film, but first, let’s look at scanners. Disclaimer: This is only a brief overview of some of the options available and does not go into specifics of any of them. Digital image scanners are still a relatively new invention in the history of photography. It wasn’t until the 1980s when computers became more readily available and capable that flatbed scanners became commonplace. In reprographics, drum scanners [the first of which was built way back in 1957] were the go-to professional choice, and they are still considered to produce the best scans from film, although many of the older ones, [which still work perfectly well] suffer from obsolete interfaces. The more common flatbed scanners proved to be a far better solution for reflective artwork, such as B&W photo prints, and that popularity drove down the prices and upped the resolution.

Nowadays a 6400 dpi scanner, such as the Epson V600, can be bought new for £250-£300, complete with a hood and mounts to allow film scanning. Unfortunately, scanning 35mm with a consumer flatbed scanner doesn’t always produce the best results. 120film fares a lot better, and large format film is no problem at all. But it is a good, intermediate solution of non-critical work. I remember buying my first scanner at the end of the 1980s, it was so expensive that it came with a full version of Photoshop, which wasn’t a cheap piece of software back then. Of course, there are professional-level flatbeds for scanning film. Back in the mid-90s, I worked in the repro house of a huge commercial printer and they used a Scitex flatbed scanner that produced incredible results.
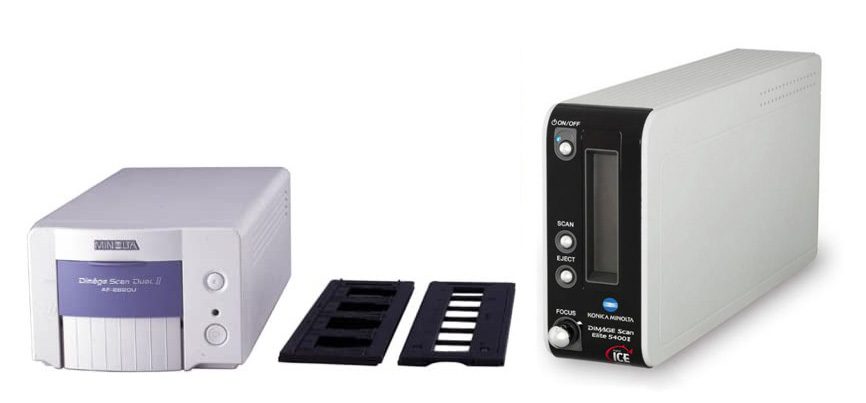
There are still models around today, although they are rebranded or co-branded, you need to do a serious amount of scanning to justify the cost. The best, affordable, option is a film scanner. There are a few expensive lab-level machines available with an appropriate price tag, such as those from Noritsu and Hasselblad, but for quality home scanning, two options that I am familiar with are the Minolta DiMage and the Nikon Coolscan. My first personal film scanner was the DiMage, and it produced quite impressive results. Models range from resolutions of 2800dpi up to a whopping 5400dpi. The lower resolution models are still affordable but the 5400 models are now going for around £1000 on eBay.
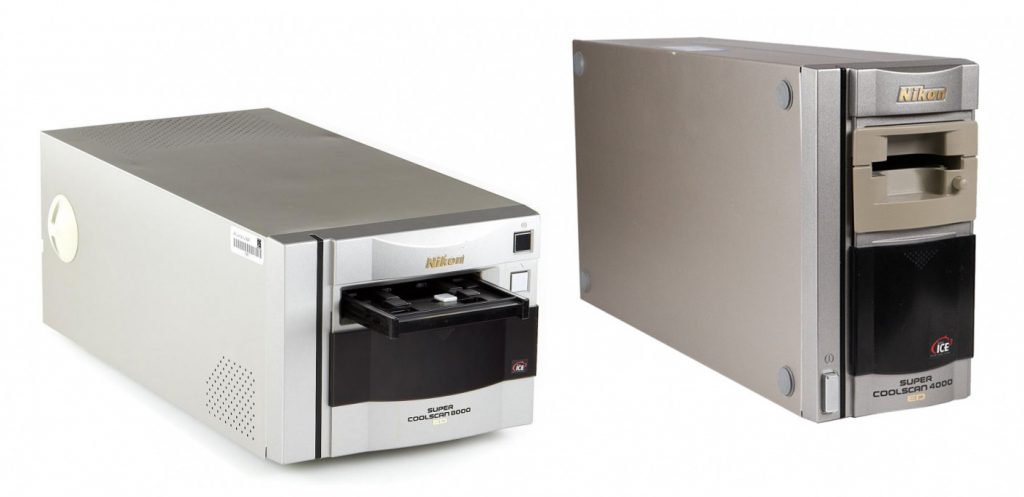
One advantage of the DiMage is they come with film holders that let you batch scan up to six negs or four mounted slides. Nikon Coolscan comes in various models with a variety of resolutions, all the way up to Super Coolscan 8000 or 9000, which scans both 35mm and 120, but fetch prices around £1500 and upwards. Even the Super Coolscan4000 model, which I have at the moment, commands prices of up to £1000. Both the 8000/9000 and the 4000/5000 are 4000dpi scanners, giving the equivalent of a 20-megapixel file, which is plenty for most users.
The results are great but each image takes a while to scan and get to a good reproducible standard, depending on the original, of course. It does help that these scanners have ICE, which removes dust and scratches during the scanning, except with Kodachrome. If you want to go to a higher resolution then it is much better to have it done on a drum scanner at a professional lab. The DiMage, Coolscan and other similar film scanners take up minimal desktop space compared with flatbed scanners. They usually have USB and/or FireWire connections.
Because of the age of them, it is usually USB-1 and FireWire 400. If you are planning to get one of these older scanners then it is probably also worth getting/using an older [pre-2012] Mac [MacMini, iMac or MacBook] that still has FireWire and USB-2 ports to use as a dedicated scanning machine. If you are using a more recent machine, there are FireWire to Thunderbolt adapters and hubs for the pre-USB-C peripherals. Other film scanner options include Plustek [starting at £250] and Pacific Image, who both make new film scanners. I’ve not used them and only read mixed opinions about their use and image quality, but they are mostly cheaper than the DiMage and you’ll get a warranty and bundled software. Plustek has just released a new 120 Pro scanner that sells for £2000.
If you buy a used DiMage or Coolscan scanner, you will also need some scanning software, as the bundled dedicated software with these older models won’t work on anything beyond MacOS 10.4 if you’re lucky, although it will apparently work on most versions of Windows. I’ve never used a Windows machine so can’t speak about them. I recommend VueScan software for scanning as it works with just about every scanner available. It also comes with three different scanning ability options, from allowing the software to do most of the work up to where you have control over all the settings. Silverfast is another option, but this usually needs a version dedicated to the scanner model and has its own share of fans and haters. Both programs will scan to DNG RAW format, which will give you a bit of extra editing leeway, as well as standard formats such as TIFF and jpeg. The TIFF and DNG files can get pretty big though.
Compact standalone film scanners that are flooding Amazon and eBay at the moment aren’t really worth considering and are aimed at a very basic consumer-level usage, such as getting old family snaps digitised to post on social media. Fine, if that’s what you’re after, but the image quality can be pretty bad and some are prone to scratching the film, but they are quick and sometimes offer options such as 110 film carriers. As the range in price from £50 to £200 with promises of up to 20-megapixel scans they can be tempting, but you get what you pay for and aren’t worth it if you want your scans printed or displayed anywhere other than online, where they are not going to get much more than a cursory glance.
Using a film scanner can be a time-consuming process but, with patience and the right scanner, the results are worth the effort. And let’s face it, most of us have plenty of spare time on our hands at the moment. In the next article, I will look at the digitising film with a digital camera and some of the options available. In the final part, I will go into more detail on the workflow and post-processing options that bring the scans to life.
Parts 2 and 3 will be linked here as soon as they go live.
About the author